


本頁面說明如何使用 Cloud Build 私人集區,從私人的虛擬私有雲網路存取資源。
在本教學課程中,您將在虛擬私有雲網路中,建立 Compute Engine 代管的 JFrog Artifactory,然後設定在私人集區中執行的建構作業,從該 Artifactory 存取資料。JFrog Artifactory 是開放原始碼的二進位檔存放區管理工具。
目標
- 在 Compute Engine 上設定 JFrog Artifactory
- 將檔案上傳至 Artifactory
- 建立私人集區
- 將代管私有集區的服務供應商網路,對等互連至 Artifactory 的虛擬私有雲網路
- 編寫建構設定檔,存取 Artifactory 中的資料
費用
在本文件中,您會使用下列 Google Cloud的計費元件:
- Compute Engine
- Cloud Build
如要根據預測用量估算費用,請使用 Pricing Calculator。
事前準備
- 登入 Google Cloud 帳戶。如果您是 Google Cloud新手,歡迎 建立帳戶,親自評估產品在實際工作環境中的成效。新客戶還能獲得價值 $300 美元的免費抵免額,可用於執行、測試及部署工作負載。
-
In the Google Cloud console, on the project selector page, select or create a Google Cloud project.
Roles required to select or create a project
- Select a project: Selecting a project doesn't require a specific IAM role—you can select any project that you've been granted a role on.
-
Create a project: To create a project, you need the Project Creator role
(
roles/resourcemanager.projectCreator), which contains theresourcemanager.projects.createpermission. Learn how to grant roles.
-
Verify that billing is enabled for your Google Cloud project.
Enable the Compute Engine, Cloud Build, Service Networking APIs.
Roles required to enable APIs
To enable APIs, you need the
serviceusage.services.enablepermission. If you created the project, then you likely already have this permission through the Owner role (roles/owner). Otherwise, you can get this permission through the Service Usage Admin role (roles/serviceusage.serviceUsageAdmin). Learn how to grant roles.-
In the Google Cloud console, on the project selector page, select or create a Google Cloud project.
Roles required to select or create a project
- Select a project: Selecting a project doesn't require a specific IAM role—you can select any project that you've been granted a role on.
-
Create a project: To create a project, you need the Project Creator role
(
roles/resourcemanager.projectCreator), which contains theresourcemanager.projects.createpermission. Learn how to grant roles.
-
Verify that billing is enabled for your Google Cloud project.
Enable the Compute Engine, Cloud Build, Service Networking APIs.
Roles required to enable APIs
To enable APIs, you need the
serviceusage.services.enablepermission. If you created the project, then you likely already have this permission through the Owner role (roles/owner). Otherwise, you can get this permission through the Service Usage Admin role (roles/serviceusage.serviceUsageAdmin). Learn how to grant roles.
選項 A:使用 Cloud Shell
在進行本教學課程時,您可以使用 Cloud Shell,其中已預先安裝本教學課程所使用的 Google Cloud CLI。如果使用的是 Cloud Shell,則不需要在工作站上安裝這些指令列工具。
如要使用 Cloud Shell:
按一下主控台視窗頂端的「啟用 Cloud Shell」
 Google Cloud 按鈕。
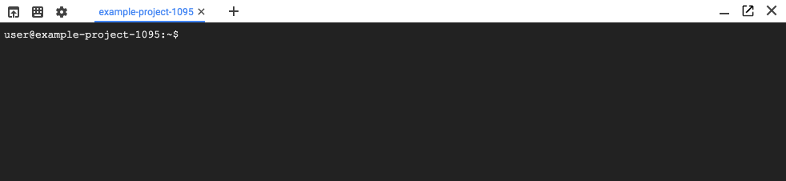
系統會在 Google Cloud 控制台底部的新頁框中開啟 Cloud Shell 工作階段,並顯示指令列提示。
選項 B:在本機使用指令列工具
如果您想在工作站上進行本教學課程,請按照下列步驟安裝必要工具。
建立私有 Artifactory
從容器建立 Compute Engine 執行個體:
gcloud compute instances create-with-container jfrog \
--container-image docker.bintray.io/jfrog/artifactory-jcr:latest \
--zone us-central1-a
透過 SSH 登入執行個體。容器可能需要幾分鐘才能初始化。
gcloud compute ssh --zone us-central1-a jfrog執行下列指令來測試連線。容器準備就緒後,會先傳回
200HTTP 代碼,然後傳回 HTML 網頁。curl -i http://localhost:8081如要在 Artifactory 建立存放區,您必須簽署 JFrog 使用者授權協議 (EULA):
curl -XPOST -vu admin:password http://localhost:8081/artifactory/ui/jcr/eula/accept畫面會顯示類似以下的輸出:
    *   Trying 127.0.0.1:8081...
    * Connected to localhost (127.0.0.1) port 8081 (#0)
    * Server auth using Basic with user 'admin'
    > POST /artifactory/ui/jcr/eula/accept HTTP/1.1
    > Host: localhost:8081
    > Authorization: Basic ….
    > User-Agent: curl/7.74.0
    > Accept: */*
    >
    * Mark bundle as not supporting multiuse
    < HTTP/1.1 200 OK
    < X-JFrog-Version: Artifactory/7.19.9 71909900
    < X-Artifactory-Id: ….
    < X-Artifactory-Node-Id: jfrog2
    < SessionValid: false
    < Content-Length: 0
    < Date: Fri, 25 Jun 2021 19:08:10 GMT

    * Connection #0 to host localhost left intact
將檔案上傳至 Artifactory
建立要上傳至 Artifactory 的 txt 檔案:
echo "Hello world" >> helloworld.txtJFrog 隨附預設範例存放區。使用預設憑證上傳至存放區:
curl -u admin:password -X PUT \
"http://localhost:8081/artifactory/example-repo-local/helloworld.txt" \
-T helloworld.txt
這應該會傳回:
    {
    "repo" : "example-repo-local",
    "path" : "/helloworld.txt",
    "created" : "2021-06-25T19:08:24.176Z",
    "createdBy" : "admin",
    "downloadUri" : "http://localhost:8081/artifactory/example-repo-local/helloworld.txt",
    "mimeType" : "text/plain",
    "size" : "12",
    "checksums" : {
      "sha1" : "...",
      "md5" : "...",
      "sha256" : "..."
    },
    "originalChecksums" : {
      "sha256" : "..."
    },
    "uri" : "http://localhost:8081/artifactory/example-repo-local/helloworld.txt"
    }
輸入
exit結束 SSH 工作階段。移除外部 IP 位址,這樣一來,Artifactory 就只能從私人內部來源存取。
gcloud compute instances delete-access-config --zone us-central1-a jfrog
嘗試從 Artifactory 存取資料
設定環境變數,儲存專案 ID 和專案編號:
PROJECT_ID=$(gcloud config list --format='value(core.project)')
PROJECT_NUMBER=$(gcloud projects describe $PROJECT_ID --format='value(projectNumber)')
將 Compute Engine 檢視者角色授予用於建構的服務帳戶,以便查看 JFrog 執行個體的內部 IP 位址:
gcloud projects add-iam-policy-binding $PROJECT_ID \
    --member=serviceAccount:SERVICE_ACCOUNT \
    --role=roles/compute.viewer
其中 SERVICE_ACCOUNT 是服務帳戶電子郵件地址。
建立名為
cloudbuild.yaml的檔案,其中包含下列程式碼,可從 Artifactory 讀取資料。這是建構設定檔。第一步是從您建立的 Artifactory 擷取內部 IP 位址。第二個步驟會向該地址傳送要求,讀取您建立的
helloworld.txt檔案。這些步驟分開列出,方便您找出權限和網路錯誤。如果第一個步驟失敗,表示發生權限錯誤,您需要確認建構服務帳戶是否能存取 Compute Engine 資源,如上一個步驟所示。如果第二個步驟失敗,表示發生網路錯誤。本教學課程的其餘部分會說明網路設定。使用建構設定檔啟動建構作業。
根據預設,在 Cloud Build 上執行建構作業時,建構作業會在安全的託管環境中執行,並存取公開網際網路。每項建構作業都會在專屬的 worker 上執行,並與其他工作負載隔離。預設集區的環境自訂程度有限,特別是私人網路存取權。在本範例中,您嘗試從公開工作站存取私人網路。
使用下列指令執行
cloudbuild.yaml。測試應會失敗。gcloud builds submit --no-source輸出結果如下所示:
BUILD
Starting Step #0 - "Get Private Artifactory Address"
Step #0 - "Get Private Artifactory Address": Already have image (with digest): gcr.io/cloud-builders/gcloud
Finished Step #0 - "Get Private Artifactory Address"
Starting Step #1 - "Pull from Private Artifactory"
Step #1 - "Pull from Private Artifactory": Already have image (with digest): gcr.io/cloud-builders/curl
Step #1 - "Pull from Private Artifactory":   % Total    % Received % Xferd  Average Speed   Time    Time     Time  Current
Step #1 - "Pull from Private Artifactory":                                  Dload  Upload   Total   Spent    Left  Speed
  0     0    0     0    0     0      0      0 --:--:--  0:02:09 --:--:--     0curl: (7) Failed to connect to 10.128.0.2 port 8081: Connection timed out
Finished Step #1 - "Pull from Private Artifactory"
ERROR
ERROR: build step 1 "gcr.io/cloud-builders/curl" failed: step exited with non-zero status: 7
從連線逾時情況來看,Cloud Build 無法連線至內部 IP 位址。如要存取這項私人資源,您必須使用 Cloud Build 私人集區。
在 Artifactory 的虛擬私有雲網路與服務供應商網路之間建立私人連線
首先,請確認虛擬私有雲網路允許連入。建立防火牆規則,允許傳入的內部流量進入含有
jfrog執行個體的網路。範圍10.0.0.0/16位於私人位址空間,您將在下列步驟中用於 Cloud Build 私人集區。gcloud compute firewall-rules create allow-private-pools --direction=INGRESS \ --priority=1000 --network=default --action=ALLOW --rules=all --source-ranges=10.0.0.0/16為 Cloud Build 私人集區建立預留範圍,供工作站使用。預留範圍必須位於 Artifactory 所在的網路。在本例中,這是指
default運算網路。設定預留範圍時,有兩種做法。您可以提供
--addresses和--prefix-length來明確指定範圍,也可以根據提供的prefix-length,允許 Google Cloud 佈建可用範圍。在下列範例中,您會明確設定位址,以符合您建立的防火牆規則。私人集區會使用這個位址空間,且不會封鎖連入流量。
gcloud compute addresses create jfrog-ranges --global --purpose=VPC_PEERING \
--addresses=10.0.0.0 --prefix-length=16 --network=default
將虛擬私有雲網路與 Service Networking API 對等互連。
Cloud Build 私人集區會使用 Service Networking API 執行工作人員。這樣一來,您就能在內部 IP 位址上提供代管服務。方法是將執行 Cloud Build 私人集區工作站的 Google 管理虛擬私有雲,與您自己的虛擬私有雲對等互連。 這項作業應該會在幾分鐘內完成。
gcloud services vpc-peerings connect --service=servicenetworking.googleapis.com \
--ranges=jfrog-ranges --network=default
建立私人集區
default虛擬私有雲網路現在可與 Cloud Build 私人集區搭配使用。建立私人集區,並與虛擬私有雲網路對等互連。gcloud builds worker-pools create jfrog-pool --region us-central1 \ --peered-network=projects/${PROJECT_ID}/global/networks/default如要使用新的私人集區執行建構作業,您可以透過
gcloud指令傳遞--worker-pool旗標,也可以更新cloudbuild.yaml設定,確保系統一律使用私人集區。在本教學課程中,請新增下列選項來更新cloudbuild.yaml:完整檔案如下所示:
啟動建構:
gcloud builds submit --no-source建構作業會使用與虛擬私有雲網路對等互連的新私人集區,因此可以存取 Artifactory 的內部 IP 位址。輸出內容會成功,且
Step #1應會列印「Hello world」。
清除所用資源
為避免因為本教學課程所用資源,導致系統向 Google Cloud 帳戶收取費用,請刪除含有相關資源的專案,或者保留專案但刪除個別資源。
如果您是為了這個教學課程建立新專案,請刪除專案。如果您已使用現有專案,並想保留專案,但不要本教學課程新增的變更,請刪除為本教學課程建立的資源。
刪除專案
如要避免付費,最簡單的方法就是刪除您為了本教學課程所建立的專案。
刪除專案的方法如下:
- 前往 Google Cloud 控制台的「Manage resources」(管理資源) 頁面。
- 在專案清單中選取要刪除的專案,然後點選「Delete」(刪除)。
- 在對話方塊中輸入專案 ID,然後按一下 [Shut down] (關閉) 以刪除專案。
刪除教學課程資源
刪除您在本教學課程中部署的 Compute Engine 服務:
gcloud compute instances delete jfrog刪除防火牆規則:
gcloud compute firewall-rules delete allow-private-pools --network=default移除預留範圍:
gcloud compute addresses delete jfrog-ranges --global刪除 Cloud Build 私人集區:
gcloud builds worker-pools delete jfrog-pool
後續步驟
- 瞭解如何使用私人集區設定常用的私人網路。
- 瞭解如何搭配私人集區使用 VPC 服務控制項